Trimming your dog’s nails doesn’t need to be a stressful experience! With the right tools, techniques, and approach, you can help keep your pet comfortable and healthy. Routine nail care not only prevents discomfort but also supports your dog’s overall well-being. In this guide, you’ll learn everything from selecting the best nail trimming tools to step-by-step methods for a safe and easy trim.
Why Regular Nail Trimming Matters
Keeping your dog’s nails trimmed is about more than aesthetics. Unchecked growth can lead to discomfort, infections, and even joint issues over time. For many dogs, long nails can impact their gait and posture, which in turn can affect their quality of life. Here’s why regular nail care should be a key part of your dog’s grooming routine.
Health Benefits of Keeping Nails Short
For dogs, excessively long nails can be uncomfortable. When nails grow too long, they can interfere with walking and lead to postural changes that may cause joint pain, particularly in older dogs. This discomfort can also impact your dog’s ability to play or exercise properly, potentially leading to obesity or other health issues over time. Regular trimming keeps their paws healthy, allowing them to move comfortably without strain.

Behavioral Benefits of Routine Nail Maintenance
Getting your dog used to regular nail care can make the grooming process more manageable and less stressful. Consistent nail trimming helps desensitize your dog to the process, meaning they’re less likely to react negatively during each session. With positive reinforcement and patience, your pet will associate nail trimming with treats and praise rather than fear.
Preparing for the Trim: Tools and Environment
Before you begin trimming your dog’s nails, it’s essential to have the right tools and to create a calming environment. Using the appropriate nail trimming tools can prevent accidental injuries and ensure a smooth process.
Essential Tools for Nail Trimming
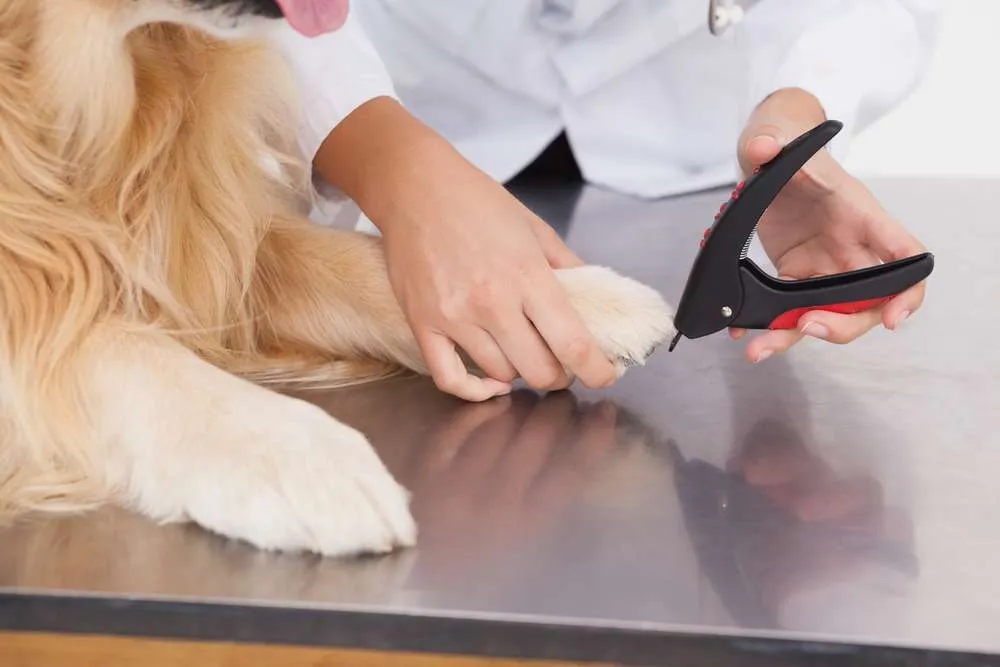
- Nail Clippers: There are different types of dog nail clippers, including guillotine-style and scissor-style clippers. Clippers with safety guards are a good option for beginners to avoid cutting too close to the quick.
- Nail Grinders: These tools use a rotating grinder to file down nails gradually, making them ideal for dogs with thicker nails or for owners who want more control over nail length.
- Styptic Powder: In case you accidentally cut the quick, styptic powder can help stop any bleeding immediately. It’s always wise to have this on hand during trimming sessions.
- Nail Files: A simple nail file can help smooth out rough edges after clipping or grinding. This can prevent snags and keep your dog’s nails comfortable.
Setting Up a Comfortable Environment
Setting up a calm and controlled environment can make all the difference for a successful nail trim. Choose a quiet space with minimal distractions. Placing your dog on a non-slip surface, like a rubber mat, can also help them feel secure. Have treats nearby for positive reinforcement and a favorite toy to hold their attention.

Step-by-Step Guide to Trimming Your Dog’s Nails
Trimming your dog’s nails safely involves several steps, each designed to make the process smoother and prevent stress for your pet. Here’s a breakdown of each step, from preparing your dog for handling to achieving a clean, smooth trim.
Step 1: Get Your Dog Comfortable with Handling
Start by touching and gently holding each paw. Your dog should feel relaxed when you’re handling their paws. Practicing this regularly, even when you’re not trimming their nails, can make the experience more familiar and less anxiety-inducing.
- Begin by gently stroking each paw.
- Reward calm behavior with treats or verbal praise.
- Gradually extend this to holding the paw firmly yet gently.
Step 2: Identify the Quick
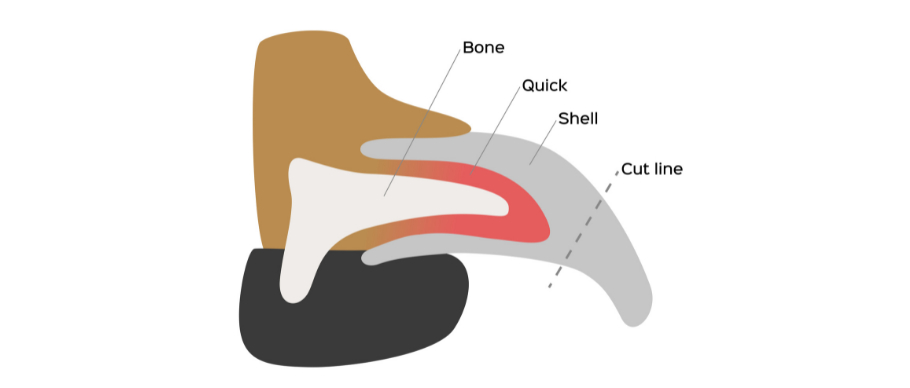
The “quick” is the pinkish part of a dog’s nail that contains nerves and blood vessels. Cutting into the quick is painful for dogs and can lead to bleeding, so it’s essential to avoid it. For dogs with light-colored nails, the quick is easier to see. However, for dogs with darker nails, taking smaller cuts is the safest approach.

Step 3: Trim in Small Increments
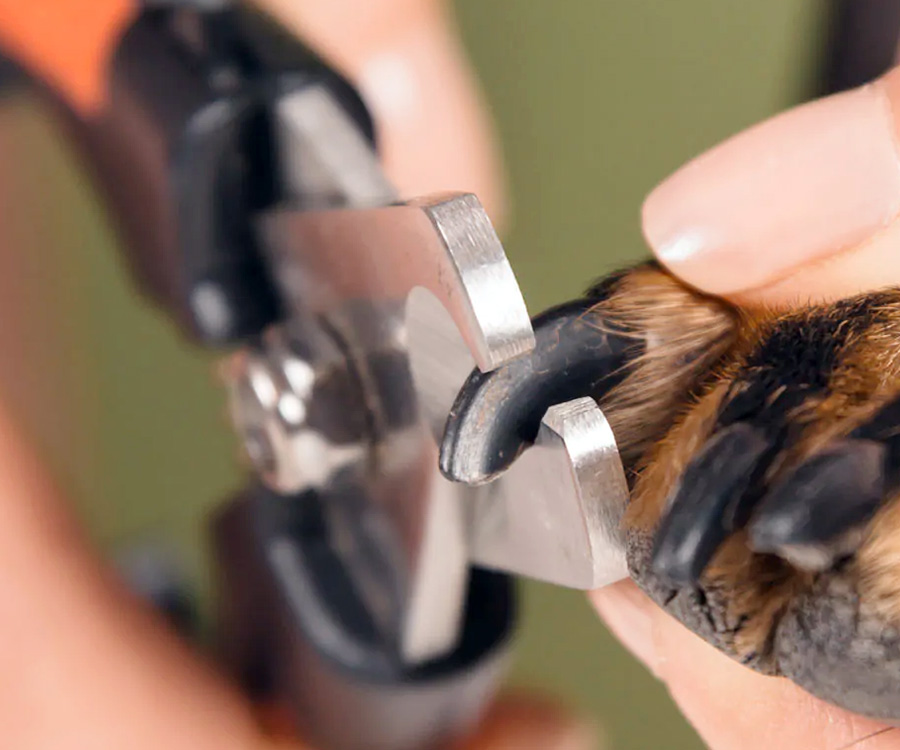
To avoid cutting the quick, aim to trim only small amounts at a time. If you’re using clippers, position them at a slight angle and gently cut the tip of the nail. Grinders are excellent for filing down the nail in controlled increments, and they allow you to avoid sharp cuts altogether.
- Clipping Tips: Position the clipper at a 45-degree angle and avoid cutting too far back.
- Grinding Tips: Start slowly and allow your dog to get used to the sound of the grinder. Focus on smoothing out the edges gradually.
Step 4: Smooth the Edges
After trimming, use a nail file or grinder to smooth out rough edges. This final step makes the nail less likely to snag on carpet or fabric and gives a polished finish to your grooming session.
Tips for Managing Anxiety and Keeping the Process Positive
If your dog is nervous or uncooperative during nail trims, there are ways to ease their anxiety. Recognizing signs of stress and using positive reinforcement can create a much smoother experience.
Recognizing Signs of Stress in Your Dog
Dogs often communicate stress through subtle behaviors, such as pulling paws away, whining, or licking their lips. If you notice these signs, it’s essential to pause and reassure your dog before proceeding.
Making Nail Trimming a Positive Experience
Turning nail trims into a rewarding experience can make a significant difference in your dog’s comfort. Offering treats and praise throughout the process helps create a positive association with nail care. Many dogs respond well to short breaks during grooming and a treat reward after each paw.

Troubleshooting Common Issues
Even with the best preparation, nail trims don’t always go as planned. Here’s how to handle some of the most common issues.
What to Do if You Cut the Quick
If you accidentally cut into the quick, stay calm and use styptic powder to stop the bleeding. Hold the powder against the nail for a few seconds until it clots, then allow your dog a break before continuing.
Addressing Fear of Clippers or Grinders
If your dog is uncomfortable with the tools themselves, start by introducing the clipper or grinder gradually. Let your dog sniff the tool, then reward them with a treat. For grinders, turning the tool on without touching their nails can help them adjust to the sound.
Establishing a Routine for Nail Trimming
Regular nail care keeps your dog’s paws healthy and helps them feel more comfortable during grooming. Developing a consistent routine ensures their nails stay at a safe length without the need for drastic trimming.
How Often to Trim Your Dog’s Nails
The frequency of nail trims varies by breed and lifestyle. Dogs that spend a lot of time walking on concrete may naturally wear down their nails, while less active dogs may require more frequent trims. On average, trimming every 3-4 weeks is ideal for most dogs.
Maintaining Nail Health Between Trims
To keep nails manageable between trimming sessions, encourage your dog to walk on rough surfaces, which naturally helps reduce nail length. Regular play and exercise also help promote healthy paws.
Learning how to trim your dog’s nails can be a rewarding experience, strengthening the bond between you and your pet. With patience, the right tools, and a consistent approach, nail trimming becomes a natural part of your dog’s grooming routine. Following these steps, you can provide the care and attention your dog needs to stay comfortable and happy.

After 5 years in a high pace business management role, I partnered with an e-commerce developer to start building Dog Supplies Warehouse.
Our number one goal is to make sure all products are managed and delivered to our customers door fast and accurately.
